Arch Linux is a lightweight and flexible Linux distribution that tries to Keep It Simple (KISS), but I am sure you have done your research on Arch Linux.
So lets dive into the steps to install Arch Linux from scratch:
Make a bootable drive
If using Windows, download Rufus and create a bootable drive. If you are on Linux, you can use the dd command to create a live USB.
Installation
Insert your bootable drive and select “Install Arch Linux” and follow below steps:
Verify boot mode
| |
If the command shows the directory without error, then the system is booted in UEFI mode.
If the directory does not exist, the system may be booted in BIOS (or CSM) mode.
Connect to Internet
Step 1: Check network interfaces
| |
Step 2: Setup wifi and Connect Internet
| |
Replace <passphrase>, <wlan0>, <wifi_ssid> appropriately. <wlan0> is wifi interface, use ip link to check
yours.
Step 3: Check if Internet is working
| |
Setup datetime
Here we will setup System Clock, read more about system_time
Step 1: Set Network Synchronization
| |
Step 2: Setting timezone, run timedatectl list-timezones to list all timezones
| |
Step 3: Check if properly configured
| |
We will sync with hardware clock later.
Partition devices
Note: If you have dual boot, make sure you have already alloted blank space for linux partition. Else please do this in the current os (Windows for me).
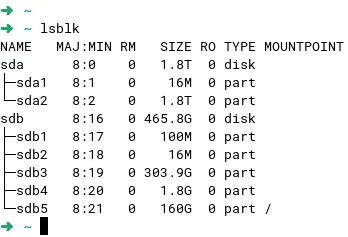
Step 1: Check partition volumes
| |
Output for me:
Step 2: Minimum we need the following partitions:
- One partition for the root directory
/. - For booting in UEFI mode: an EFI system partition.
You can have separate partition for SWAP, and even your home directory, skipping this here.
Step 3: Use fdisk to partition your drives.
Note: Be careful with the tool, it may delete your existing data and drives.
In my case, the drive was /dev/sdb, see below image: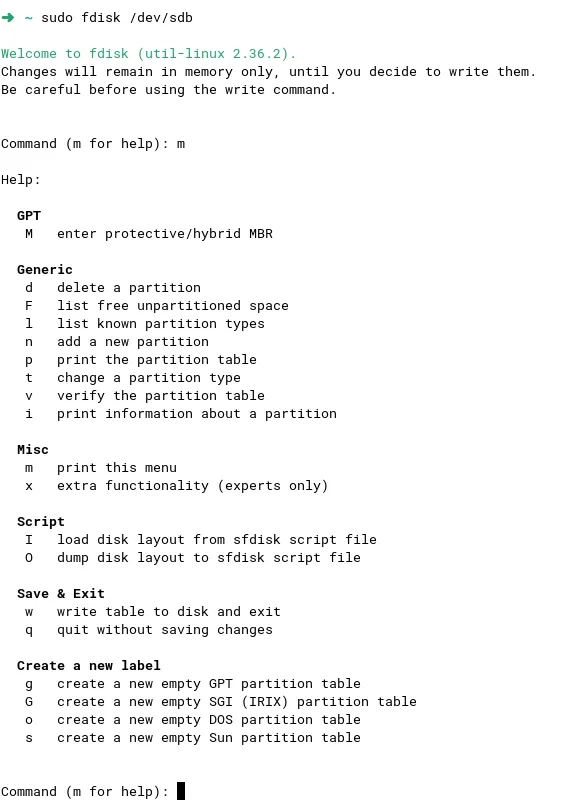
Create a new partition using the tool (delete existing partition if required, be careful before you save your changes, you might lose your data on the drive).
Step 4: Format the partition
| |
Use the partition which you created with fdisk, for me it is /dev/sdb5
Step 5: Format partition for UEFI filesystem (boot menu)
If reinstalling or replacing old linux distro, this would have been already there, so you can skip this. Replace with the partition you created, for me it is /dev/sdb1
| |
Step 6: Extra:
If using SWAP, format SWAP partition also, replace swap_partition
| |
Mount the file system
| |
Here, I mounted /dev/sdb5 which was my partition (see above image).
Installing essential packages
| |
Configurations
Fstab
Fstab: Defines how disk partitions, various other block devices, or remote filesystems should be mounted into the filesystem
| |
Changing root directory
Currently our root directory is that of bootdrive, we will change root directory
to the system disk (/mnt -> drive we mounted in previous step)
This step is very important and all other configurations need to follow after this, or else the installation won’t be complete.
| |
Timezone
This is to setup local time configuration, see localtime for more info
| |
Above I am setting Asia/Kolkata, you can select your timezone from this directory /usr/share/zoneinfo
| |
Sync with hardware clock
| |
Localization
Edit /etc/locale.gen and uncomment en_US.UTF-8 UTF-8 and then run below commands:
| |
| |
Network
Setup a hostname for your system (here: wilstation)
| |
Configuring hosts file, replace hostname with what you setup above in below command
| |
Users
Create user and setup password, creating wilspi here
| |
Sudoers, users who can run sudo command, below is simple configuration
wherein users who are part of wheel group can run sudo
| |
| |
| |
Boot Configuration
Run Below commands to setup your boot configuration:
| |
| |
Note: For below command, /dev/sdb1 (my UEFI partition) is mounted to /boot/efi
| |
| |
| |
| |
Root Password
| |
Desktop Environment (GNOME)
We will be setting up GNOME as the desktop environment, as the GNOME page says, GNOME is simple, beautiful and elegant.
You can use any other from this list of desktop environments.
| |
Enable GDM (Gnome Desktop Manager) service,
this will make sure when you next restart your system GDM service (graphical user interface) will be up and you won’t have to
login via command line interface
| |
Pre final steps
We are almost done, setting up drivers and enabling services.
Enabling means the system will run the service on the next boot. So if you enable a service, you don’t need to manually start the service after you start your service.
Step 1: Graphics driver
| |
nvidia pkg works for most of the nvidia graphics driver, check other packages for nvidia drivers for confirmation.
Step 2: Enable NetworkManager
| |
You can use other network managers as well.
Step 3: Enable Bluetooth
| |
Final steps before rebooting
Step 1: Unmount uefi partition
| |
Step 2: Exit chroot
| |
Step 3: Unmount system partition
| |
Step 4: Reboot
| |
Post Installation
After logging in,
Step 1: Connect Internet via wifi
Add wifi details using nmcli, a cli (command line interface) tool for NetworkManager, you can connect Internet via GUI also:
| |
Step 2: Install other utility packages using pacman:
| |
Step 3: Setup yay for AUR, yay is yet another yogurt, pacman wrapper and AUR
helper:
| |
Remedies
GDM takes too much time to reboot, sometimes get stuck on loading screen.
This happens because nvidia drivers are not getting loaded before GDM.
Add nvidia modules in MODULES in file: /etc/mkinitcpio.conf, see below:
| |
Rebuild image:
| |
More details: Nvidia page on Arch Wiki
Not able to connect to Internet
Sometimes due to some mishap (configs/packages go outdated, you missed installing something) you are not able to connect to Internet.
You can chroot into the machine and fix the network issue.
- Reload the bootloader
- Load into the terminal (by choosing installing Arch)
- Setup your internet
- Change root to your system using
chroot
System Screenshots
Keeping it simple silly.